
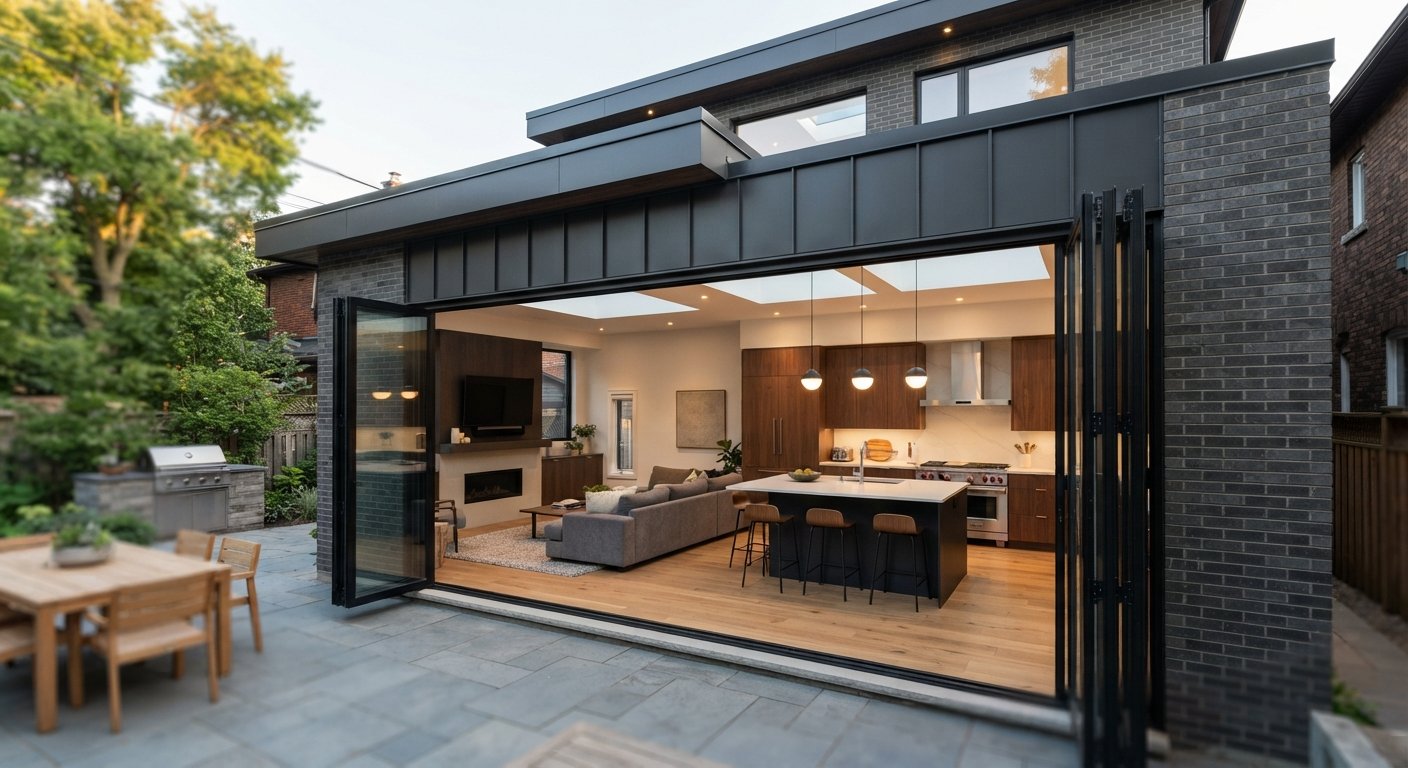
Most Toronto homeowners who call about a rear extension already know what they want to fix: a kitchen that feels like a corridor, a family that has nowhere to land together, a main floor that gets dark by mid-afternoon. What they don’t yet know is what a good rear extension looks like — the layout decisions, the light, the doors, the roof, and the way the new space meets the old house.
Those design decisions matter more than square footage. Two extensions of the same size can feel completely different: one bright, connected to the yard and easy to live in, the other a deep, dim box added to the back of the house. The difference is almost always in the design brief and the details — not the budget.
This guide is the design companion to our Home Addition Cost Guide. That post covers what additions cost, permits and timelines. This one covers what to build: layouts that work for Toronto lots, ways to bring in light, choosing glass doors for our climate, roof shapes, how to join the extension to your existing house, and the mistakes worth avoiding. If you are also thinking about opening the walls inside the existing house, read it alongside our Open Concept Renovation Guide and Kitchen Renovation Ideas Guide.
Table of Contents
- Why Toronto Homes Extend to the Back
- Start with the Design Brief — Not the Floor Plan
- Layout Ideas That Work on Toronto Lots
- Bringing Light Into a Deep Plan
- Glass Doors to the Yard: Sliding vs. Bi-Fold vs. French
- Roof Shapes for a Rear Extension
- Joining the Extension to the Existing House
- Exterior Finishes: Match, Blend or Contrast?
- Interior Details That Make It Feel Finished
- Keeping the Backyard Part of the Plan
- Design Mistakes to Avoid
- Where to Spend — and Where to Save
- From Idea to Drawings: What Happens Next
- How David Reno Can Help
- Frequently Asked Questions
Why Toronto Homes Extend to the Back
On most Toronto lots the rear is the only direction with real room to grow. The front is tied to the street and the neighbours’ building line, and side space is typically narrow or shared. That is why the rear extension is the standard answer for older semi-detached and detached homes whose kitchens and main floors were planned for smaller households and different habits.
It also solves a problem that is specific to many Toronto semis: the middle of the house is the darkest part. Neighbouring walls limit side windows, so light only comes from the front and back. A well-designed rear addition can pull daylight deep into the plan, but only if light is part of the design from the beginning.
Planning rules (height, setbacks, how much of the lot can be built on) shape what is possible on your property, so a good design always starts by understanding those limits. We touch on that near the end; the full cost and permit picture is in the Home Addition Cost Guide.
Start with the Design Brief — Not the Floor Plan
The best extensions begin with a short written brief about how your household actually lives. Answer these before anyone draws a line:
- Who cooks, and how many at once? One cook and a crowd of onlookers needs a different kitchen from two people cooking together.
- Where do people end up during a normal evening? If everyone gravitates to the kitchen, build the extension around that, not around a formal room that will rarely be used.
- Where do shoes, coats, backpacks and sports gear land? A back entry or mudroom is often the most valuable small feature in the whole project.
- Do you need a quiet corner? Homework, a work-from-home desk or a reading nook can be designed in from the start.
- How do you use the yard? Dining outside, kids playing, gardening — this determines how the new room should meet the outdoors.
- What must stay? A mature tree, a favourite window, a deck you’d like to keep, the neighbour’s privacy.
Layout Ideas That Work on Toronto Lots
IDEA 1 The Kitchen-First Extension
The most common and usually the most rewarding layout: the extension becomes the new kitchen, and the old kitchen space is repurposed (as a dining room, pantry, laundry, mudroom or an open connection to the living area). The island or peninsula sits in the new space, with seating facing the yard.
Works best when: the existing kitchen is small, enclosed or dark, and your household cooks and gathers in the kitchen.
Design notes: keep the working triangle clear of walkways, plan the island with generous clearance on all sides, and place tall appliances and pantry storage on the side walls so the yard-facing wall stays open to light. See our Kitchen Renovation Ideas Guide for island sizing and layout rules.
IDEA 2 Kitchen + Dining “Table Zone”
Instead of one large undefined room, the extension holds a kitchen along one side and a dining table near the glass. The table sits where the light is best and the view of the yard is clearest, which pulls the household naturally toward the back of the house.
Works best when: you entertain, or the family eats together most evenings and the current dining room is rarely used.
Design notes: a change in ceiling treatment (a lowered kitchen zone and a higher or skylit dining zone) can define the two areas without walls.
IDEA 3 The Family Room Extension
Here the existing kitchen stays (often lightly updated), and the extension adds a relaxed family room beside it. This is a good approach when the kitchen layout is already workable but the household lacks a comfortable place to spread out.
Works best when: kids, TV, games and everyday clutter compete for space in the living room.
Design notes: think about acoustics (soft finishes and a door or partial wall between kitchen and family room if one person works from home), and plan built-in storage along one wall so the room stays calm.
IDEA 4 Back Entry, Mudroom and Kitchen Combined
Many Toronto homes have a back door that opens straight into the kitchen. A rear extension is the ideal moment to add a proper back entry with bench seating, hooks, closed storage and a place for wet boots — and to link it to the garden or a rear lane/garage if you have one.
Works best when: the household comes and goes through the back, or you have a rear garage, laneway or yard access.
IDEA 5 Flex Space: Office, Guest Room or Teen Zone
A smaller extension can hold a home office with its own door, a guest bedroom with a nearby bath, or a teen hangout. The key is flexibility: use wiring, lighting and storage that will still make sense when your needs change.
Design notes: if the room might become a bedroom later, plan for window size, nearby plumbing and wall construction accordingly. If you’re considering a suite for a parent, check the rules and credits discussed in our Toronto Renovation Rebates Guide.
IDEA 6 Two Storeys at the Back
On narrow lots, building up as well as out can make better use of the footprint: a kitchen and living space below and a bedroom or primary suite above. One Toronto project we looked at while researching this guide used a roof deck on top of the addition to replace some of the garden space the new footprint took away.
Design notes: a two-storey rear addition has more structural, zoning and neighbour-privacy considerations than a single-storey one. It is a bigger project and needs early design and zoning review.
Bringing Light Into a Deep Plan
A single-storey extension attached to a long, narrow house can end up with a dim centre if the only windows are on the back wall. The fix is to use more than one source of daylight.
| Light Source | What It Does | Things to Watch | Relative Cost Impact |
|---|---|---|---|
| Large glass doors or windows to the yard | Main source of daylight and view | Heat loss in winter, summer sun on west-facing glass | Medium to high |
| Skylights (fixed or opening) | Brings light into the middle of the plan from above | Summer heat gain; choose suitable glazing and consider operable units for venting | Medium |
| Roof lantern / large rooflight | Dramatic single source of daylight over a table or island | Needs careful insulation and detailing in our climate | High |
| Clerestory (high windows on a raised roof) | Daylight and privacy at once, even on tight lots | Requires a taller roof section; check height limits | Medium to high |
| Corner windows or a corner glazing detail | Diagonal views and extra light at the corner | Structural detailing at the corner | Medium |
| Glazed internal openings (to the old house) | Shares daylight with the existing rooms | Needs structural support where walls are opened | Medium |
Think About Orientation
The direction your rear yard faces changes how glass behaves. On many Toronto streets the rear of the house faces north or south; on north–south streets it faces east or west. A few general rules of thumb:
- South-facing rear: bright, with welcome low winter sun. Plan overhangs, blinds or glazing coatings for summer.
- North-facing rear: soft, even light with little glare. Large windows work well, but they need strong thermal performance.
- West-facing rear: beautiful evening light, but a big glass wall can overheat in summer. Consider shading, deeper overhangs or fewer, larger fixed panes.
- East-facing rear: bright mornings that suit a breakfast table or kitchen.
Glass Doors to the Yard: Sliding vs. Bi-Fold vs. French
A wall of glass opening to the yard is the signature feature of many modern extensions. In a cold climate it also needs the most careful specification. Here is how the main options compare.
| Door Type | Look & Feel | Strengths | Watch-Outs in Toronto |
|---|---|---|---|
| Sliding / lift-and-slide | Clean, modern, large panes with slim frames | Big views, simple operation, usually good sealing | Only part of the opening is open at once; heavy panes need proper support and tracks that drain well |
| Bi-fold | Folds away to open most of the width | Nearly full opening for indoor–outdoor living | More joints and hardware to keep sealed and maintained; a west-facing glass wall can run hot in summer; confirm thermal performance |
| French doors | Traditional, symmetrical | Suits older homes, simple and reliable, good ventilation | Door swing needs clear space; narrower view than a sliding wall |
| Single large fixed window + one door | Picture-frame view with a normal door | Best thermal performance per dollar, simple to build | Less dramatic opening to the yard |
Specification Points for a Cold Climate
- Thermal performance: ask for frames with thermal breaks and high-performance glazing, and compare U-factor ratings between products rather than choosing on appearance alone.
- Threshold: a flush (level) threshold feels seamless and is more accessible, but it must be detailed carefully for drainage and snow. Make sure the door supplier and your contractor agree on the exterior detail.
- Sightlines: slim frames look elegant, but check that they meet your thermal and structural needs.
- Shading: for west and south glass, consider a roof overhang, a pergola, or exterior shading in the design, not as an afterthought.
- Security: multipoint locking and laminated glass options are worth pricing for ground-floor glazing at the back of the house.
Roof Shapes for a Rear Extension
The roof is one of the biggest design and cost decisions in an extension, and it often determines how much light you can bring in and how the new volume looks from the neighbours’ side.
| Roof Shape | Design Benefits | Considerations |
|---|---|---|
| Flat or low-slope roof with skylights | Allows higher interior ceilings within height limits; easy to fit skylights or a roof lantern; can hold a green roof or roof deck | Needs excellent insulation, drainage and waterproofing detailing; discuss maintenance and expected roof life with your contractor |
| Shed (mono-pitch) roof | Slopes up toward the yard to allow tall glass and a clerestory strip at the high edge | Check height limits and how it meets the existing house wall |
| Gable or hip tied into the existing roof | Matches traditional Toronto rooflines, good for heritage-style homes | More complex tie-in; often more expensive; limits ceiling height if the existing roof is low |
| Roof deck over the addition | Gives back outdoor space lost at ground level; works well on narrow lots | Privacy, guard design, structure and zoning limits all need review early |
One Toronto example worth noting: on a semi-detached house where the existing roofline sloped low, the original rear addition had left the space feeling enclosed and cut off from the yard because of a change in floor level. The designers solved it with large areas of glass in doors, windows and skylights, and the same approach — rethinking the roof and floor relationship — is the right question to ask on many older homes.
Joining the Extension to the Existing House
The place where old meets new is where an extension either feels natural or feels like an add-on. These are the details to plan carefully.
1. Match the Floor Level
A step down into the new room can disconnect it from the rest of the house and, in some designs, from the yard. If the existing floor and the garden are at different levels, plan the transition deliberately (a continuous floor level, a generous landing, or a deliberate step with a clear purpose) rather than letting it happen by accident.
2. Choose How Wide the Opening Is
Opening the old rear wall can be a large doorway, a wide cased opening or nearly the full width of the room. A wider opening shares light and makes the space feel larger, but it needs a properly designed beam and temporary support during construction. Our Open Concept Renovation Guide covers structural walls and beam work in detail.
3. Reuse Existing Windows and Rooms Creatively
The old rear window can become a door, a pass-through or a built-in seat. The old kitchen can become a pantry, laundry room, mudroom or butler’s pantry. Keeping part of the old rear wall as a “nib” (a short projecting wall section) can also help define zones without closing the space.
4. Plan Ceiling Heights
If the extension ceiling is higher than the existing one, the transition should feel intentional — for example a step in the ceiling marked by a beam, a change in material or a line of lighting. If it’s lower, check that sightlines and head clearance still feel comfortable at the opening.
5. Keep Flooring Continuous
Running the same flooring from the old rooms into the new one is one of the simplest ways to make the extension feel original. If the existing hardwood is old or discontinued, plan to blend or refinish a larger area rather than trying to match a small patch. See our Flooring Installation Guide for material options.
Exterior Finishes: Match, Blend or Contrast?
How the extension looks from the yard and from the neighbours’ properties matters as much as how it feels inside. There are three basic approaches:
| Approach | What It Looks Like | Best For |
|---|---|---|
| Match | Same brick, trim and roof style as the existing home | Heritage or character streets where the addition should disappear |
| Blend | Related colours or materials in a simpler form (for example, painted brick or a neutral cladding with matching trim) | Most Toronto homes — keeps harmony without the cost of an exact match |
| Contrast | A deliberately modern volume in dark cladding, metal or wood, clearly distinct from the old house | Homes where a clear “old and new” statement looks better than a near-match |
Whichever approach you choose, think about the view from the neighbours’ side as well. Window placement, rear-yard privacy, and where the roof drains all affect how the extension fits into its setting — and what zoning and permits will allow.
Interior Details That Make It Feel Finished
- Warm materials: wood tones, natural textures and softer colours keep a glass-heavy room from feeling cold. Our Kitchen Ideas Guide covers the 2026 material and colour trends in more detail.
- Layered lighting: ambient, task and accent lighting. In a room with large glass areas, plan lighting that still works at night when the glass becomes a dark mirror.
- Storage on the solid walls: put tall cabinets, pantry and built-ins on side walls so the glazed wall stays open.
- Heated floors: radiant floor heating under tile is popular in Toronto extensions, especially near large glass doors where floors feel coldest.
- Ventilation: a properly sized range hood and, in tighter modern builds, a fresh air strategy. This is one of the most common things homeowners wish they had planned earlier.
- Built-in seating: a window bench or banquette makes use of the edge of the room and gives the space a place to linger.
- Acoustics: hard surfaces plus lots of glass can echo. Rugs, upholstered seating, acoustic ceiling elements or wall panels help.
Keeping the Backyard Part of the Plan
Every square foot of extension is a square foot of yard you lose. The best designs plan the outdoor space at the same time as the indoor space.
- Flush patio or deck: a level transition from the new room to a deck or patio makes the outdoor space feel like part of the room.
- Replace lost garden: a roof deck or green roof over part of the addition can give some outdoor space back on a small lot.
- Drainage: plan how water moves away from the new foundation, roof and doors. See our Basement Waterproofing Guide for why this matters.
- Privacy: fencing, planting or screening can protect both your privacy and your neighbours’. Our Fence Cost Guide covers Toronto fence rules and materials.
- Outdoor kitchen or dining: if you plan to cook outside, think about how it connects to the indoor kitchen. See our Outdoor Kitchen Guide.
- Existing trees: protecting a mature tree can shape the whole footprint and may involve City tree protection rules. Ask early.
Design Mistakes to Avoid
| Mistake | Why It Hurts | Better Approach |
|---|---|---|
| Designing around floor area, not light | A big, deep room with only back-wall windows can end up dim in the middle | Plan overhead light and internal openings from the start |
| Too much glass facing the wrong direction | West-facing glass can overheat; north-facing glass can lose heat | Match glazing size and type to orientation |
| Ignoring the floor-level change | A step or ramp in the wrong place can disconnect the new room from the house or the yard | Decide the transition early and draw it clearly |
| Forgetting ventilation and the range hood | Odours, humidity and grease in an open space | Plan hood location, duct route and fresh air early |
| Too few outlets and lighting circuits | Island, glass walls and built-ins limit where outlets can go | Plan floor outlets, island power and lighting zones before framing |
| Trying to match old brick exactly | High cost and a mismatch that looks like a mistake | Choose a deliberate blend or contrast |
| Leaving the yard for later | Drainage, access and privacy problems after construction | Design indoor and outdoor space together |
| Skipping zoning checks | You can fall in love with a design the City won’t approve | Confirm setbacks, height and coverage before detailed drawings |
Where to Spend — and Where to Save
Every extension has trade-offs. This table shows where design money is usually best spent and where it can be managed. For actual dollar figures and what drives them, see our Home Addition Cost Guide, which puts a ground-floor rear extension of roughly 400 to 600 sq ft at about $152,000 to $360,000 depending on finishes.
Spend On (hard to change later)
- Layout and structure: opening size, beam, floor level and ceiling height
- Insulation, air sealing and glazing quality: comfort and energy performance for decades
- Roof design and waterproofing: especially for flat or low-slope roofs and skylights
- Windows and doors: good-quality frames and hardware
- Electrical and plumbing rough-ins: getting these wrong means opening finished walls later
- Natural light strategy: skylights and well-placed glass change how the whole house feels
Save On (easy to upgrade later)
- Hardware, paint and light fixtures: simple to change anytime
- Furniture and window coverings
- Some finishes: countertops, backsplash and decorative tile can be upgraded in a future refresh
- Landscaping details: plan the space now, plant and finish over time
Smart Ways to Control Scope
- Use one or two operable doors with fixed glass instead of a full glass wall.
- Keep plumbing close to existing lines when possible.
- Simplify the roof shape.
- Choose a complementary exterior rather than an exact brick match.
- Combine the extension with interior wall changes in a single project to share mobilization and permits.
From Idea to Drawings: What Happens Next
- Site visit and brief: we walk the house and yard, discuss your brief, and look at access, structure and obvious constraints.
- Zoning and feasibility check: height, setbacks and lot coverage are reviewed before detailed design, so the concept is realistic.
- Concept design with an architect or designer: layouts, light, roof shape and exterior look, usually in two or three options.
- Budget review: the concept is priced against your budget before permit drawings are finalized.
- Permit drawings: architectural, structural and mechanical drawings for the City of Toronto building permit.
- Construction: foundation, structure, roof, envelope, trades and finishes, with inspections at each stage.
Design, drawings and permits take time and are usually the longest part of the project, so planning now gives you more options for when you build. Our Home Addition Cost Guide has typical timelines by addition type.
How David Reno Can Help
A good design only becomes a good extension if it is built well. David Reno works with homeowners across Toronto and the GTA to turn rear extension plans into finished spaces, from early feasibility through construction.
- Early site assessment: access, structure, drainage and zoning questions reviewed before you invest in detailed drawings.
- Design coordination: we coordinate with architects and designers so the plans are practical to build and match your brief.
- Structural and permit management: engineering input, permit applications and inspections.
- Construction of the whole addition: foundation, framing, roof, windows and doors, insulation, mechanical trades and interior finishing under one project team.
- Connecting old and new: opening the existing rear wall, installing beams, matching floors and trim, and making the transition look intentional.
- Kitchen and interior finishes: cabinetry, flooring, painting and trim — see our Kitchen Renovation Cost Guide.
- Written fixed-price quote and warranty: every line documented before work starts.
Frequently Asked Questions
What is the best use of a rear extension in a Toronto home?
For most households, an enlarged kitchen combined with a dining or family zone delivers the most day-to-day value, because the kitchen is usually the smallest and darkest room in older Toronto homes. A back entry or mudroom, a home office or a family room are also strong uses, depending on how you live. Start with a written brief about how your household uses the house and let that decide the layout.
How do I bring more natural light into a rear extension?
Use more than one source: large glass on the yard side, skylights or a roof lantern overhead, and where the design allows, a clerestory or glazed openings into the old house. Overhead light is especially helpful in single-storey extensions attached to deep houses. Consider your yard’s orientation when choosing glass sizes and shading.
Are bi-fold doors a good idea in Toronto’s climate?
They can work, but they are not automatically the best option. Large operable glass walls need strong thermal performance and careful sealing to be comfortable in winter, and a west-facing glass wall can overheat in summer. Sliding or lift-and-slide doors often provide a cleaner, better-sealed result, French doors suit traditional homes, and a mix of fixed glass with one or two operable doors can give a similar look with better performance.
Should the extension match my existing house or look different?
Either can work. Matching suits heritage streets, blending suits most homes, and a deliberate contrast can look better than an expensive near-match. The key is to make the choice on purpose, and to consider the view from the yard and from the neighbours’ properties.
How much does a rear extension cost, and do I need a permit?
Costs depend on size, foundation, finishes and access. Our Home Addition Cost Guide puts a ground-floor rear extension of roughly 400 to 600 sq ft at about $152,000 to $360,000. A rear extension is a structural addition and requires a City of Toronto building permit with architectural and structural drawings, and zoning limits such as height, setbacks and lot coverage may affect the design. A site visit is the best way to get a project-specific answer.
Can I combine a rear extension with an open-concept renovation?
Yes, and it’s very common. Extending the back and opening the old rear wall at the same time lets you design one connected main floor and share permits, structural work and trades. See our Open Concept Renovation Guide for the structural side.
Ready to Design a Rear Extension That Fits How You Live?
The best rear extensions start with a clear brief, a realistic look at your lot, and a design that puts light, layout and the yard first. David Reno can help you work through all three — and then build it.
We offer free on-site consultations across North York, Scarborough, Etobicoke, Leaside, Roncesvalles, Bloor West Village, The Beach, East York, Mississauga, Markham, Richmond Hill, and all of Toronto and the GTA.
🏠 Call us today: (647) 463-2246
📧 Email: info@davidreno.ca
📍 Serving all of Toronto & GTA
⚡ Design and permits take months — starting the conversation this winter gives you more choice for when you build.